As an Amazon Associate, we earn from qualifying purchases. Some links on this site are affiliate links at no extra cost to you. Our recommendations are based on thorough research and editorial judgment.

What Is the Ideal Beam Pattern for Handlebar-Mounted Lights?
The ideal beam pattern for handlebar-mounted lights combines several key features. First, it has a sharp horizontal cutoff to minimize glare for oncoming traffic. Second, consistent illumination across terrains is vital. We should also balance forward distance with side visibility to spot obstacles effectively. For urban riding, 250–800 lumens work best, while mountain bikers may need 800–1500 lumens. A well-structured beam guarantees we stay safe and visible while riding, and there’s more to explore on optimizing your light setup.
Key Takeaways
- An ideal beam pattern should feature a sharp horizontal cutoff to minimize glare for oncoming traffic.
- Consistent illumination across diverse terrains enhances visibility and reduces distractions during rides.
- Combining forward distance with peripheral lighting aids in spotting obstacles and enhances safety.
- Elliptical beam shapes eliminate dark spots, providing even and consistent illumination.
- Ensure lights are mounted within 150cm of the ground to avoid unnecessary glare to others.
Essential Characteristics of an Effective Beam Pattern
You may be interested


When we consider the essential characteristics of an effective beam pattern, it’s critical to focus on both visibility and safety. A sharp horizontal cutoff is vital; it directs light to the road and shoulder, preventing distractions for oncoming traffic. Beam consistency guarantees smooth illumination, allowing us to adapt to varying terrains without compromising rider comfort. Further, effective beam patterns emulate car headlights to minimize glare for other road users. We should also recognize that a balance of forward distance and peripheral lighting enhances our ability to spot obstacles. By choosing lights like the Trek Commuter Pro, which feature carefully designed beam patterns, we can guarantee safety while enjoying our ride. Additionally, considering high lumens can significantly increase visibility in urban environments, further contributing to rider safety. Ultimately, thoughtful beam shaping is key to effective nighttime cycling.
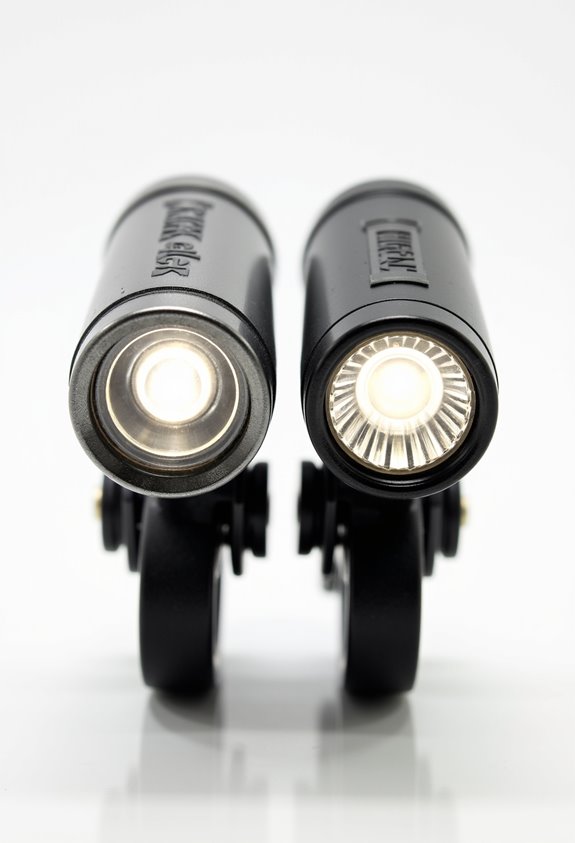
Spot vs. Flood Beam: Understanding the Differences

Understanding the differences between spot and flood beams is key for selecting the right handlebar-mounted light for our cycling needs. Spot beam advantages include a concentrated, intense light for long-distance visibility. This precision allows us to identify potholes or debris ahead quickly. Conversely, flood beam applications provide broader illumination, enhancing our peripheral awareness.
Flood beams are particularly useful in urban settings or during technical trail riding where sharp turns occur frequently. While spot beams excel in distance, flood beams help prevent tunnel vision by lighting up nearby areas, such as the front tire and trail edges. Ultimately, our choice should reflect our riding style and the terrain we encounter, balancing distance with peripheral visibility. Additionally, many LED bike lights offer customizable modes that enhance visibility for different cycling environments.
Recommended Products

MAX BRIGHTNESS BIKE LIGHT – 2000 LUMEN DUAL LED OUTPUT - Engineered for off-road performance, the Lumina Dual 2000 delivers an ultra-wide 2000-lumen beam through its dual LED design. Ideal for trail, enduro, and high-speed MTB riding, it offers powerful output and superior terrain visibility, even on the darkest nights.

LOCK MODE FEATURE keeps the Lumina 1000 Boost headlight securely powered off during transport or storage. Unlock / Lock the light by simply holding the power button down for 8-10 seconds.
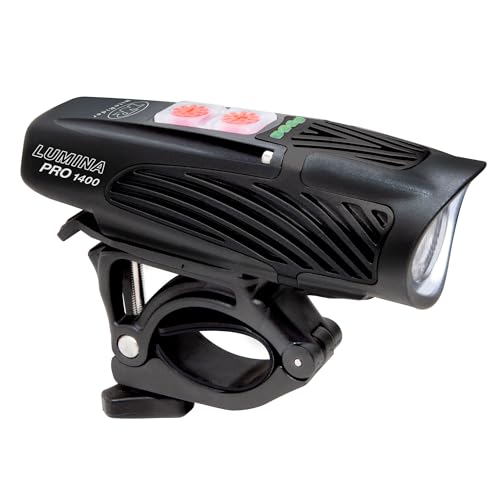
ULTRA-BRIGHT BIKE HEADLIGHT (1400 LUMENS) -- Illuminate your ride with up to 1400 lumens of maximum brightness using FL1 Standard Boost Mode. Engineered for high-speed commuting, trail riding, and road cycling with a wide-angle beam pattern that improves night visibility and rider safety.
Challenges of Cutoff Beam Patterns

Cutoff beam patterns present unique challenges for handlebar-mounted lights, particularly due to their design intent of reducing glare.
Beam Aiming and Positioning
One major issue is achieving the correct beam aiming. When handlebars tilt down, the cutoff line shifts, creating dark spots where we need light most, especially in dips.
Lighting Limitations
In addition, since cutoff beams focus light horizontally, they may leave immediate areas dimly lit. This can be dangerous in uneven terrains, where dynamic lighting is essential. Furthermore, mechanical shields designed for cutoff can limit coverage, risking insufficient illumination. Lights with IPX4 rating or higher are beneficial for durability in various weather conditions.
Adjustment Difficulties
To maintain efficacy, precise aiming is vital. However, handlebars’ movement complicates this, making it challenging to sustain the necessary horizontal orientation for ideal visibility.
Recommended Products
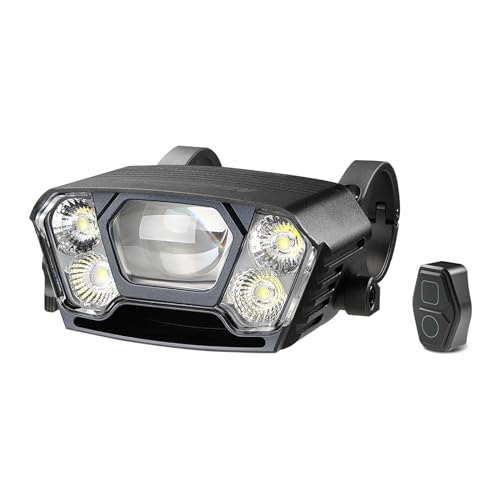
Five high-power LEDs provide a tremendous 12,000 lumens.
FTR LightSync One-Touch Intelligent Control: Experience ultimate convenience and safety. The included MJ-6558 remote allows you to simultaneously power ON/OFF and switch modes of both the HORI1300S headlight and SEEMEE 150 MAG taillight with a single click. Keep your hands on the handlebars and focus on the road.

【Super Bright Rechargeable Bike Light】The Magicshine EVO 1700 is a bike headlight with a maximum output of 1700 lumens. It features a fast-charging USB-C port that supports high-current charging, effectively reducing charging time so you can get back on the road quickly.
Lumens and Beam Width: Tailoring to Rider Types

In the pursuit of effective lighting solutions for handlebar-mounted lights, understanding lumens and beam width is essential for tailoring performance to specific rider types.
Lumens Range for Rider Types
- Urban Riders: 250–800 lumens for visibility without glare.
- Road Cyclists: 400–600 lumens for well-lit roads, 800+ for dark areas.
- E-Bike Users: 500–1000 lumens to match speeds and visibility needs.
- Mountain Bikers: 800–1500+ lumens for complex terrain.
- Gravel Riders: 500–1000 lumens for variable conditions.
Beam Width’s Role in Rider Safety****
Wider beams enhance peripheral awareness, vital in urban settings. Meanwhile, narrower, focused beams work best for faster environments. Tailoring lumens range and beam width will greatly improve rider safety across different cycling scenarios. Additionally, the use of lights with anti-glare optics can significantly enhance visibility while minimizing distractions for oncoming traffic.
Recommended Products

𝗙𝗥𝗘𝗘𝗦𝗞𝗬 𝗹𝗶𝘀𝘁𝗲𝗻 𝘁𝗼 𝗰𝘂𝘀𝘁𝗼𝗺𝗲𝗿𝘀' 𝗮𝗱𝘃𝗶𝗰𝗲 𝗮𝗻𝗱 𝗮𝗰𝘁𝗶𝘃𝗲𝗹𝘆 𝗶𝗺𝗽𝗿𝗼𝘃𝗲 𝗪𝗔𝗥𝗥𝗜𝗢𝗥 𝗣𝗥𝗢! 𝗧𝗵𝗲 𝗹𝗮𝘁𝗲𝘀𝘁 𝘃𝗲𝗿𝘀𝗶𝗼𝗻 𝗪𝗔𝗥𝗥𝗜𝗢𝗥 𝗣𝗥𝗢 𝗰𝗼𝗺𝗲𝘀 𝘄𝗶𝘁𝗵 𝗿𝗲𝗮𝗿 𝗿𝗮𝗰𝗸, 𝗳𝘂𝗹𝗹-𝗰𝗼𝘃𝗲𝗿 𝗳𝗲𝗻𝗱𝗲𝗿𝘀, 𝗮𝗻𝗱 𝗻𝗲𝘄 𝗲𝗹𝗲𝗰𝘁𝗿𝗼𝗻𝗶𝗰 𝗰𝗼𝗻𝘁𝗿𝗼𝗹 𝘀𝘆𝘀𝘁𝗲𝗺 𝘄𝗶𝘁𝗵 𝗧𝗨𝗥𝗡 & 𝗕𝗥𝗔𝗞𝗘 𝗟𝗜𝗚𝗛𝗧𝗦.

Eahora Juliet Pro 2 - 5400W/60V 70Ah/40-43mph/180-220miles

【4000W Dual Motor, Faster & Powerful】 TESWAY X9 Ultra electric bike for adults use dual brushless geared motor, geared motors can provide higher torque for the ebike. Speed can reach up to 43 MPH, 0-35MPH about 10S. Delivers 240NM torque, climbs 40° slopes, 400LBS max load. Easily handle all terrains like mountain roads, sand and snow, letting you enjoy the ride to the fullest.
Practical Considerations for Optimal Visibility

For ideal visibility while riding, it’s essential to evaluate various practical aspects of handlebar-mounted lights. We must focus on urban visibility, where broader flood beams illuminate surroundings effectively, adhering to safety regulations.
Recommended Products

72 mph Top Speed – Enjoy high-speed urban travel with powerful acceleration

【𝙂𝙤 𝙁𝙪𝙧𝙩𝙝𝙚𝙧, 𝘾𝙝𝙖𝙧𝙜𝙚 𝙇𝙚𝙨𝙨】Ride up to 300 miles on a single charge with the 72V 70Ah removable battery—perfect for long commutes and weekend adventures. 3000+ charge cycles mean years of reliable use, and the intelligent BMS protects against overcharge and overheating. Remove the 46LB battery easily for indoor charging and security.

【𝟯𝟬𝟬+ 𝗠𝗜𝗟𝗘 𝗨𝗟𝗧𝗥𝗔-𝗟𝗢𝗡𝗚 𝗥𝗔𝗡𝗚𝗘】Equipped with a massive 60V 80Ah removable battery, the A9 Pro Max electric bike delivers up to 300+ miles in PAS mode for commuting, off-road adventures, and long-distance riding. The advanced Smart BMS protects against overheating, overcharging, and short circuits for safer, more reliable performance. With 3000+ charge cycles and a removable 41LB battery for easy indoor charging, this long range ebike is built for years of powerful riding.
Beam Patterns and Shape
Using elliptical beam shapes eliminates dark spots, ensuring consistent illumination. Wider beam angles enhance side visibility critical for urban environments.
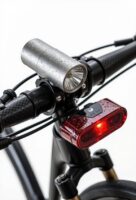
Mounting Height and Intensity
Front lights should mount within 150cm of the ground to minimize glare for others. Lights should emit at least 4 candelas, though higher outputs are preferable for varied conditions.
Adaptive Features
Multiple beam modes provide flexibility for different terrains. Efficient power management prevents rapid battery drain, ensuring extended use for nighttime riding. Additionally, the battery life of bike lights can significantly impact their usability during long rides in low-light conditions.
Frequently Asked Questions
How Do Weather Conditions Affect Lighting Performance?
Like knights facing dragons, we understand weather conditions greatly influence light visibility and riding safety. Fog, rain, snow, and dust scatter light, necessitating adjustments in our bike lights to guarantee we see and be seen clearly.
Can I Use a Car Light as a Bike Headlight?
We can’t use a car light as a bike headlight due to compatibility issues and headlight regulations. Car lights are too bright, potentially blinding others, and often fail to meet safety standards for cycling.
How Often Should I Replace My Bike Light?
We should replace our bike lights every 3 to 5 years, considering the light lifespan. Frequent usage may shorten this timeframe, so we must monitor brightness and malfunction for timely replacement. Safety’s our priority!
Do Battery Types Impact Light Brightness and Duration?
Yes, battery technology markedly impacts light efficiency. Lithium-ion batteries generally provide brighter, longer-lasting illumination compared to NiMH or lead acid, ensuring our rides are safer and more enjoyable without frequent recharges.
What Accessories Enhance the Effectiveness of Bike Lights?
To enhance our bike lights’ effectiveness, we should consider light reflectors, safety vests, and adjustable mounts. These accessories improve visibility and stability, helping us ride safely, especially in low-light conditions or challenging terrains.