As an Amazon Associate, we earn from qualifying purchases. Some links on this site are affiliate links at no extra cost to you. Our recommendations are based on thorough research and editorial judgment.

Where Should I Mount My Bike Lights for Maximum Visibility?
To mount bike lights for maximum visibility, we should position front lights at the fork crown, aiming to illuminate 50-65 feet ahead. Rear lights belong on the seat post for best visibility; if blocked, consider the rear rack or saddle bag clips. A combination of a high-output seat post light and a secondary lower-output light increases our visibility. Utilizing flashing modes and ensuring all lights work properly are essential for safety. Let’s explore more specific strategies.
Key Takeaways
- Mount front lights at the fork crown for optimal beam distribution, illuminating 50-65 feet ahead for safety.
- Position rear lights on the seat post for the best height and visibility; use alternatives if the seat post is occupied.
- Implement a high-output light on the seat post and a secondary lower-output light on the stays for layered visibility.
- Use a “triangle setup” with differently colored lights to enhance attention from motorists and improve overall visibility.
- Ensure compliance with local laws by using lights that emit the required visibility range for both front and rear.
Optimal Front Light Placement
You may be interested

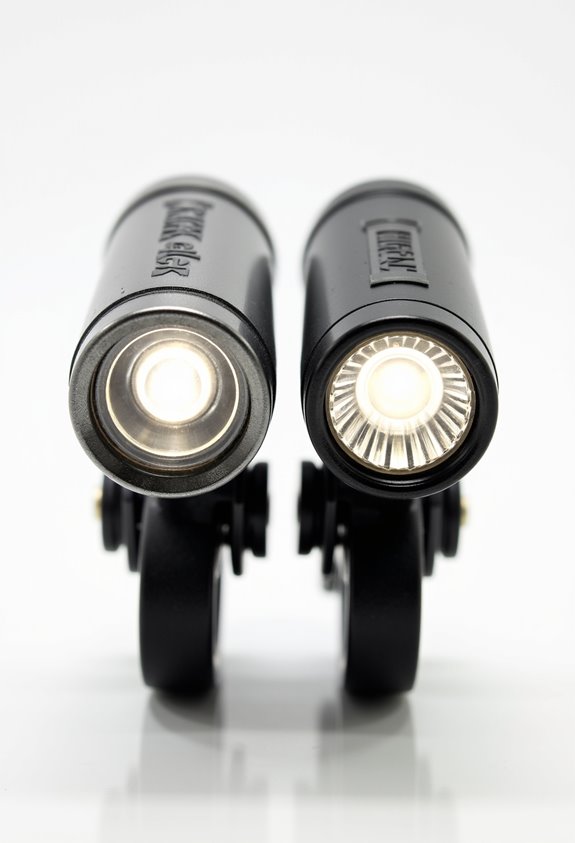
When it comes to mounting front bike lights, we need to focus on achieving the best visibility without dazzling oncoming traffic. The ideal front light height is at the fork crown, just above the front tire. This placement guarantees the best beam distribution while minimizing glare for others. A height that’s too low leads to excessive illumination near the rider and poor distance visibility, whereas too high decreases close-ground illumination but is less problematic.
Additionally, beam angle adjustment is essential. Properly angled lights should illuminate 50-65 feet ahead to enhance safety. For combined setups, we can use one light for distance and another for close visibility. Using steerer tube or axle mounts can also help secure the light and maintain beam effectiveness. Furthermore, selecting lights with a high lumen output, such as the Magicshine Hori(1300 lumens), ensures optimal visibility during your rides.
Recommended Products

🏍️eAhora Romeo Pro 3 electric bike for adults! 🛍️2026 Electric Mobility, eAhora Romeo Pro 3 Helps You Travel Smoothly.

【Upgraded Version:Swift Horse Ultra 】: Upgraded to a 35AH high-capacity battery, delivering a significant boost in riding range.

【Removable 50V 30Ah 1560Wh High-Capacity Battery】Equipped with a detachable 52V 30Ah large lithium battery, this e-bike for adults allows a longer ride time. Your journey length will adjust according to terrain and load, ensuring your exploration is endless. Removable battery makes it easy to charge, whether at home or work (7-9 hours fully charged).
Rear Light Mounting Positions

Rear light placement is just as important for visibility as front light positioning. The best mounting position is the seat post, as it offers ideal height and visibility. When the seat post is occupied, consider using a rear rack; this location maintains height and accessibility.
If space is tight, mounting the light under the saddle is an option, but be cautious, as visibility may be compromised. Alternatively, saddle bag clips can be utilized when the seat post is not accessible. For improved side visibility, we can mount lights on the seat stays.
Whichever method we choose, ensuring visibility height helps drivers see us clearly, while avoiding obstruction from components like mudguards is vital for safety. Additionally, selecting a light with high lumens can significantly enhance your visibility during nighttime rides.
Recommended Products
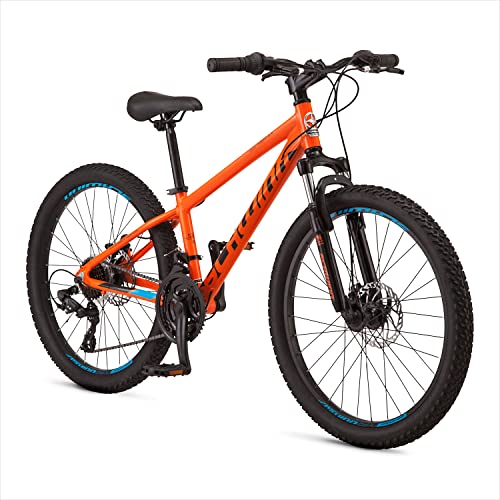
Lightweight 12 inch aluminum mountain frame is the perfect bike for rides around your neighborhood or trails with 24-inch wheel frame fit riders 4’8” to 5’6” inches tall
Bundle Includes - 1 x DJI Osmo Action 5 Pro Standard Combo | 2 x Extra Batteries | 1 x 64GB microSDXC Card | 1 x 58-in-1 Accessory Kit

Lightweight Aluminum Frame: Crafted meticulously from 6061 heat-treated aluminum, the top-tier 26-inch dual suspension mountain bike frame seamlessly blends durability with lightweight prowess, tipping the scales at a mere 36 pounds.
Multi-Light Configuration Strategies

In order to maximize our visibility while cycling, utilizing a multi-light configuration is crucial. We should employ a primary high-output light mounted on the seatpost, providing 20-100 lumens for main visibility. A secondary lower-output light, positioned on the stay or bag, can enhance layered visibility at 15-50 lumens. This combination also guarantees redundancy if the primary fails.
Adopting a “triangle setup” creates a visual shape beneficial to drivers. Placing lights at varied heights, such as a helmet-mounted light, increases recognition. Utilizing different light colors and brightness levels, including steady and flashing modes, improves attention from motorists. Proper light placement enhances our safety, guaranteeing maximum visibility on roads, especially in complex environments. Additionally, using lights with multiple flashing modes can significantly increase visibility in low-light conditions.
Recommended Products

【52V 25Ah 1300Wh Battery】This ebike for adults electric is equipped with a 1300Wh large capacity removable battery, which offers more range per charge and more cycles (1000+). With the single peak 2500W ebike can ride up to 100 miles in PAS mode, and 50 miles in pure electric mode.

Electric Scooter with 3 Seats: Equipped with 3 Seats, this adult electric scooter comfortably accommodates one child and two adults simultaneously. Besides, the child's seat in front can be removable for more space to carry pets & cargo, making it versatile for various needs.

SPORTY PERFORMANCE - The ShockStop PRO Endurance bike suspension seatpost delivers 35mm of damped suspension travel, providing the perfect choice for riders who want a full travel but lightweight seatpost with a sporty feel and high levels of tunability.
Special Considerations by Riding Condition

Understanding the specific requirements for bike lights based on our riding conditions is essential for maximizing safety and visibility.
Urban Commuting
For urban commuting, front lights should be at handlebar height, ensuring broad illumination of road hazards. Rear lights mounted on seat posts improve visibility from behind in traffic. Side-mounted lights are key at intersections. Additionally, using high-lumen output lights can significantly enhance your visibility in bustling city environments.
Trail Navigation
In contrast, trail navigation demands helmet-mounted lights to direct beam movement, while powerful front headlights enhance obstacle detection. Rear lights are critical for those following on narrow trails, ensuring safety.
Low Visibility Weather
In conditions like fog or rain, broad front headlights and flashing rear lights improve visibility considerably. Using bright frame colors or reflective tape can further aid in identifying our bikes.
Alternative Mounting Options for Bikepacking and Specialized Bikes

When biking in various conditions, we need to think beyond traditional mounting solutions, especially for bikepacking and specialized bikes. One effective option is using aerobars, which provide stable platforms for front lights. These mounts improve beam projection and can be outfitted with universal computer mounts. For light weight, consider nylon wrap-around mounts on non-round frame sections for secure positioning.
Rear lights can be effectively mounted on seatstays or frame tubes with straps, ensuring they remain stable over rough terrain. Additionally, helmet mounts enhance visibility without adding weight or complexity to the bike. By exploring these unconventional mounts, we can maximize our visibility while maintaining the balance and integrity of our bikepacking setups. Proper mounting techniques are crucial for effective use of bike lights, enhancing safety during night rides.
Recommended Products

Rotational light housing and plate holder for use in both the down and vertical positions

ADVANCED CUSTOMIZATION: Upgrade your triathlon setup with TriRig Wingspan Extenders XL – the ultimate aero bars for road bike optimization. Featuring Armrest Angle Adjustment Plate and reach adjustment brackets bike, these extenders deliver precise fit and comfort. Perfect for athletes seeking the most dialed-in road bike arm rest position and superior triathlon performance.

Optimized for Stable BTA Hydration Setup: Experience unmatched stability and control with this Universal BTA Adapter Plate your ultimate aero hydration mounting bracket. Secure your aero water bottle or bike water bottle cage between the arms for a wobble-free ride, keeping your hydration system steady through every sprint, climb, and long aero water bottle triathlon course.
Legal and Visibility Requirements
Legal and Visibility Requirements are essential for safe biking, especially during low-light conditions. These standards guarantee our safety and compliance with local laws.
Front Light Requirements
Front lights must emit a white light visible from 300 to 500 feet, depending on jurisdiction. We can mount these lights on our bike frame or wear them.
Rear Light and Reflector Requirements
Rear lights need to emit red light visible from 500 feet, and red reflectors are legally mandated in many areas. Additionally, it’s important to choose lights with high visibility taillight features for enhanced safety.
Side Reflectors
We must also have side reflectors, typically amber on front spokes and red on the rear.
Enhancing Visibility With Light Modes
Effective visibility when biking isn’t just about having lights that meet legal requirements; it’s also about how we use those lights. Utilizing various flashing patterns considerably increases our visibility, especially during the day. These patterns grab the attention of drivers and pedestrians, effectively differentiating us from static street lights.
Moreover, lights equipped with multiple brightness settings allow us to adapt to changing light conditions. For instance, blending a high-lumen steady light with a low-power flashing option provides flexible visibility management. Using flash modes not only consumes less battery, extending our ride duration, but also serves as a safety cue, especially when we brake, mimicking a vehicle’s brake lights. Additionally, selecting lights with a minimum of 1000 lumens significantly enhances our visibility in low-light situations. Adjusting these settings smartly enhances our overall safety on the road.
Recommended Products

【𝟯𝟬𝟬+ 𝗠𝗜𝗟𝗘 𝗨𝗟𝗧𝗥𝗔-𝗟𝗢𝗡𝗚 𝗥𝗔𝗡𝗚𝗘】Equipped with a massive 60V 80Ah removable battery, the A9 Pro Max electric bike delivers up to 300+ miles in PAS mode for commuting, off-road adventures, and long-distance riding. The advanced Smart BMS protects against overheating, overcharging, and short circuits for safer, more reliable performance. With 3000+ charge cycles and a removable 41LB battery for easy indoor charging, this long range ebike is built for years of powerful riding.

Powerful Dual-Motor Ebike: Equipped with dual 4500W peak motors (9000W total peak power) delivering 220 N.m torque. Achieves speeds up to 47 MPH (conditions dependent) and climbs inclines up to 45°for you enjoy the excitement and passion of riding!

Powerful Dual-Motor Ebike: Equipped with dual 4500W peak motors (9000W total peak power) delivering 220 N.m torque. Achieves speeds up to 47 MPH (conditions dependent) and climbs inclines up to 45°for you enjoy the excitement and passion of riding!
Tips for Adjusting Light Positioning
To enhance our bike safety and visibility, we must pay close attention to how we position our lights. Proper light alignment is vital for maximizing effectiveness. Rear lights should be mounted 6-10 inches below the saddle, with a slight downward tilt adjustment of 0-5° to reduce glare and improve visibility. Front lights should be installed on the handlebars, angled towards the road surface to illuminate hazards without blinding others.
In group rides, it’s important to angle lights downward to prevent dazzling fellow cyclists. For cargo bikes, consider using multiple lights at varying heights for peak visibility. Adjusting mounting brackets meticulously guarantees that our lights maintain their intended direction, allowing for enhanced safety on the road. Additionally, using lights with multiple lighting modes can provide versatility for different riding conditions and improve overall visibility.
Frequently Asked Questions
What Types of Bike Lights Are Best for Night Riding?
For night riding, we prefer high-lumen LED lights with good brightness, ideally over 1,000 lumens. Also, we check battery life—lasting longer on lower settings helps us stay visible and safe throughout our rides.
How Can Weather Conditions Affect Light Performance?
When rain-soaked streets shimmer and fog swirls, it is understood weather impacts light efficiency drastically. A soft glow may cut through a downpour, while a harsh beam gets lost in the haze, often blinding us instead.
What Are the Advantages of Using Multiple Light Colors?
Using multiple light colors offers visibility enhancement by combining different functions for various lighting conditions. We can increase detection time and improve driver recognition, ensuring we’re seen better and safer on our rides.
Can I Use Reflectors in Addition to Bike Lights?
Absolutely, we can use different reflector types alongside our bike lights! The visibility benefits are substantial, enhancing our safety. Combining them helps guarantee we’re seen from various angles, especially where lights might not reach effectively.
How Do I Maintain and Clean My Bike Lights?
To maintain and clean our bike lights, we should gently wipe them, check for damage, and guarantee battery maintenance is regular. This prolongs light lifespan, enhances performance, and keeps us safe while riding.