As an Amazon Associate, we earn from qualifying purchases. Some links on this site are affiliate links at no extra cost to you. Our recommendations are based on thorough research and editorial judgment.

How Do I Set Up My Bike on an Indoor Trainer Correctly?
To set up your bike on an indoor trainer correctly, start by installing a dedicated trainer tire and inflating it to 10-20 PSI for ideal traction. Next, use a heavy-duty skewer to mount the bike, ensuring proper alignment with the trainer’s clamps. Secure the quick-release lever and perform a tug test to confirm stability. Set up your cycling space with good airflow and keep essential items like towels nearby. Stay tuned as we explore enhancing your indoor cycling experience.
Key Takeaways
- Use a dedicated trainer tire and inflate it to moderate pressure between 10-20 PSI for optimal performance and durability.
- Securely mount the bike using a heavy-duty metal skewer and ensure proper alignment with the trainer’s resistance drum.
- Allocate at least 4 feet by 8 feet of space with good ventilation, keeping essentials like towels and drinks within reach.
- Adjust saddle height and handlebar position for comfort, aligning the saddle for optimal knee angle and maintaining consistency with outdoor riding.
- Conduct regular maintenance, including cleaning after rides and inspecting components weekly for wear and proper lubrication of the chain.
Preparing the Bike for Trainer Setup
You may be interested


When we set up our bike for an indoor trainer, the first essential step is tire and pressure preparation. Selecting the right tire is vital; a dedicated trainer tire guarantees quieter operation and durability. We should inflate the rear tire to moderate pressure—enough to allow slight squeezing but not overly firm to maintain traction with the trainer cylinder.
Next, we need to regularly check the tire condition to minimize blowout risks. Proper wheel alignment with the resistance drum is necessary for consistent performance. After our training sessions, we must remember to relieve the cylinder pressure on the tire to extend its life. By focusing on these elements, we enhance our indoor cycling experience and safeguard our equipment. Additionally, using a reliable floor bike pump can ensure optimal tire pressure for improved performance.
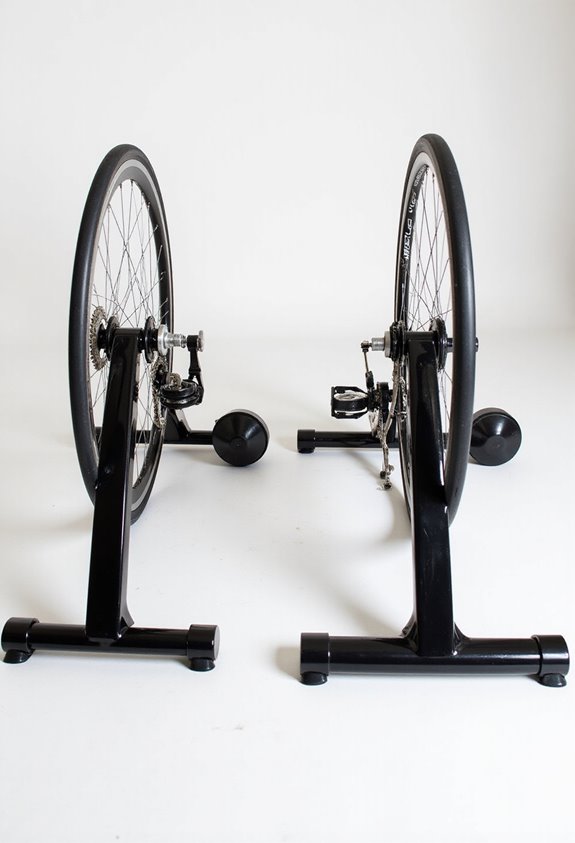
Mounting the Bike on the Trainer

To mount the bike on the trainer effectively, we need to follow a systematic approach that guarantees stability and safety throughout our indoor cycling sessions.
Selecting and Preparing the Trainer Skewer**: First, we should use a heavy-duty metal skewer** designed for trainers. Ascertain it’s tight but not overtightened to prevent damage.
Aligning the Bike Frame: Next, we align the rear dropout slots with the trainer’s clamps, or for direct-drive models, attach the rear dropouts directly onto the axle mount.
Securing the Bike: We’ll engage the quick-release lever or axle mechanism to lock the bike in place. Finally, we perform a manual tug test to confirm that all fastenings are secure. By following these mounting techniques and alignment tips, we ascertain a safe setup. Additionally, ensuring the bike’s stability and installation is crucial for preventing accidents during intense workouts.
Recommended Products

WHEEL ON: Connects to rear wheel of bike, no need to remove wheel or disassemble bike. Noise level: 69 decibels at 20 mph
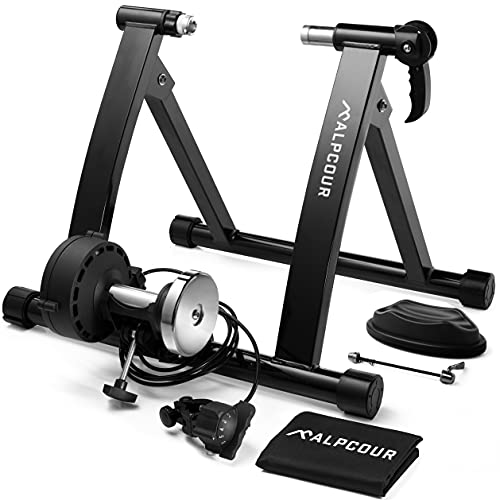
MAKE THE SWITCH TO STATIONARY! – Mag Bike Stand Converts Any Mountain or Road Bike Into a Stable, Smooth-Riding Indoor Stationary Bicycle for All-Season Training, Conditioning, Fitness & Exercise – Mag bike stand converts any mountain or road bike into a stable, smooth-riding indoor stationary bicycle for all-season training, conditioning, fitness & exercise – A must-have for dedicated cyclists!

Make Your Own Stationary Bike: Bring your bike inside for an indoor cycling workout! The Sportneer Indoor Bike Trainer fits bikes between 26-29 inches, and is also compatible with 700C bikes. You won’t have to break the bank to invest in new equipment. Simply use what you already own
Proper Indoor Cycling Space Setup

Setting up a proper indoor cycling space is vital for optimizing our training sessions. For effective space utilization, we should allocate a minimum area of about 4 feet by 8 feet, accommodating our bike, trainer, and accessories. A dedicated training zone with good airflow will enhance comfort, while keeping it inviting discourages distractions.
To optimize ambient conditions, we should ascertain sufficient ventilation, using fans to combat heat and humidity. Placing equipment near power outlets minimizes cable clutter and tripping hazards. It’s important to use waterproof mats to protect floors, manage noise, and stabilize our setup. Additionally, keeping essentials like towels and drinks within reach will guarantee we stay focused and uninterrupted during our training sessions. Incorporating a solid four-legged base for our bike stand can further ensure stability during workouts.
Recommended Products

VALUE-PACKED MEMBERSHIP: A Peloton All-Access Membership ($49.99/mo) must be purchased for your entire household to access all Peloton content and applicable features on your Peloton hardware. Age, height, and weight restrictions apply.

ZERO-IMPACT EXERCISE: Ideal for all fitness levels. The natural stepping motion and comfortable seated position eliminates stress on the joints and back while delivering a total body, fat-burning cardio workout. A great exercise option for those with Arthritis, Parkinson's or MS.

10% Automatic Incline Adjustment: This treadmill features a 10% automatic incline adjustment function that increases calorie burn, simulates real-world uphill running scenarios, adds variety and enjoyment to your workouts, and delivers better results in the same amount of time. It's perfect for users seeking to add diversity and intensity to their home workouts
Ensuring Proper Bike Fit Indoors

Ensuring proper bike fit indoors is vital for enhancing comfort and maximizing performance during our training sessions.
Saddle Height
We should adjust our saddle height so our knee alignment maintains an ideal angle of about 141° at full leg extension. A useful method is to align the saddle with the top of our hip bone when standing next to the bike.
Fore-Aft Balance
Positioning our saddle horizontally is also important. The front of our kneecap should align above the pedal center to maximize power output.
Handlebar Position
Finally, adjusting the handlebar height and reach enhances our riding posture. Higher handlebars can ease strain on our back, while maintaining consistency with outdoor settings helps preserve comfort factors during our indoor workouts. Additionally, ensuring the bike setup is aligned with torque settings can prevent unnecessary strain on components.
Recommended Products

The xR6xi accommodates exercisers who want to really challenge themselves, as well as those who prefer a leisurely ride, effectively burning calories while seated comfortably

Smart Home Gym Upgrade - Track your performance in real time with the VeloNix Performance Hub. Access detailed fitness metrics, sync across multiple devices, and enjoy built-in entertainment—stream content from popular platforms while you ride, turning your workouts into immersive experiences.

SPACE-SAVING DESIGN: The elliptical exercise machine boasts compact yet robust dimensions, measuring at 83" L x 34" W x 70" H (400 lb. weight capacity) when assembled. The Sole E98 also features a 20" stride length for an effective home workout.
Securing and Adjusting Trainer Components

Once our bike is set up for proper fit indoors, we can focus on securing and adjusting the trainer components to maximize stability and performance during our rides. First, we need to ascertain proper skewer selection. An all-metal quick release skewer designed for trainers is essential, as alloy or plastic types may cause slippage and instability. After inserting the rear wheel into the trainer clamps, we’ll tighten the skewer firmly to secure the bike.
Next, for effective resistance adjustment, we must align the resistance unit to contact the tire squarely. We use the trainer’s clamp to guarantee even pressure. Regularly checking the alignment helps prevent noise and inaccuracies. Additionally, ensuring that the bike is equipped with a safety certification can enhance rider confidence while training indoors. Finally, maintaining proper tire pressure and cleanliness improves overall performance.
Recommended Products

[Superior Compatibility]: Supports dual-mode BLE/ANT+ protocols for seamless connectivity with popular cycling apps like Zwift and MyWhoosh. Benefit from customizable training programs via the CYCPLUS app for personalized indoor sessions.

🚴[STURDY CONSTRUCTION] Two oversized steel main tubes with additional side stability tubes

Bundle Items Include: Saris Fluid2 Indoor Smart Trainer, Saris Wheel Rising Block, Saris Training Mat & Saris Towel
Maintaining Bike and Equipment During Indoor Trainer Use
To keep our bike and indoor trainer equipment functioning effectively, regular maintenance is essential. Implementing a cleaning schedule is vital. After every ride, we should wipe down the frame, handlebars, and bolts to eliminate sweat residue that can cause corrosion. Periodically, a light wash with mild soap will help remove grime.
Furthermore, lubrication techniques play a key role in drivetrain maintenance. We need to clean the chain, cassette, and chainrings regularly. Monthly, lubricating the chain with bike-specific lubricants will reduce friction and prolong its life. We should also inspect components weekly for wear and adjust bolts as necessary to confirm everything’s secure. Additionally, helmets equipped with MIPS technology can significantly enhance safety during rides, especially if you fall from your indoor trainer. By being diligent, we can markedly extend the lifespan of our bike and trainer equipment.
Selecting the Right Trainer for Your Bike
Selecting the Right Trainer for Your Bike
When selecting the right indoor trainer for our bike, we must carefully consider several important factors to guarantee compatibility and performance.
Trainer Types
We should choose between direct-drive, wheel-on, smart, and non-smart trainers, each offering unique advantages. Direct-drive trainers are typically the most accurate, while wheel-on trainers are easier to set up. Additionally, compatibility with training apps enhances the overall indoor riding experience.
Compatibility Issues
Ensuring compatibility is essential. We need to verify our bike’s axle standards and drivetrain. Additionally, confirming wheel size compatibility and frame clearance is critical for a secure fit.
Budget and Space
Finally, our budget will guide the decision. Entry-level models cost under $300, while smart trainers can exceed $1,500. We should also consider available space for stable trainer setup.
Recommended Products

Innovative design creates a realistic feel and accurate-to-life riding position; virtual shifting even simulates the sensation of changing gears

Now in its third generation, the KICKR BIKE PRO delivers the ride feel serious cyclists expect from the KICKR name. A precision flywheel and integrated motor recreate real-world resistance with every stroke. Feel every gradient, from punchy climbs to steep descents, and gear changes that respond almost immediately. Built on athlete feedback and years of innovation, this is indoor training at the cutting edge.

True Fit: Guided by an intuitive set-up app, KICKR BIKE SHIFT's 5-point adjustment system lets you easily adjust frame, setback and reach dimensions to optimize overall bike fit for comfort and performance.
Incorporating Technology and Apps for Indoor Training
Incorporating technology into our indoor cycling routine can greatly enhance our training efficiency and engagement. Many indoor cycling apps, like Zwift and TrainerRoad, sync with smart trainers via Bluetooth or ANT+, allowing for automatic resistance adjustments based on virtual terrain. This feature not only mimics real-world scenarios but also aids in performance analytics by providing real-time data on power output, cadence, and heart rate.
Moreover, app compatibility can vary, so it’s vital to confirm our chosen app works seamlessly with our equipment. By connecting multiple sensors, we can receive thorough performance analytics, which enable us to track our progress and adjust our training objectives effectively. This integration supports a data-driven approach to indoor cycling, enhancing our overall experience. Additionally, utilizing devices that offer over 40 riding metrics can provide deeper insights into your performance.
Safety Tips While Using an Indoor Trainer
Safety is a primary concern while using an indoor trainer, so we must take specific precautions to assure a secure riding environment. First, let’s assure we wear appropriate safety gear, like a helmet and proper cycling shoes. Next, before starting, familiarize ourselves with emergency procedures in case of an accident.
Setup and Environment:
- Use a trainer with a wide footprint for stability.
- Place the trainer on flat, level flooring and keep the space clear of obstacles.
Maintenance:
- Regularly check our bike and trainer for mechanical issues.
- Keep hydration nearby but within easy reach to avoid distractions. Additionally, ensuring your bike tires are properly inflated, typically between 10-20 PSI can significantly enhance your indoor riding experience.
Frequently Asked Questions
How Do I Choose the Right Indoor Trainer for My Bike Type?
To choose the right indoor trainer, we need to take into account trainer compatibility with our bike’s axle type, wheel size, and drivetrain. A proper bike fit guarantees an ideal training experience and maximizes performance during workouts.
Can I Use My Mountain Bike on a Road Bike Trainer?
Can’t we all agree mountain bikes can thrive on road trainers? With the right adjustments, like axle compatibility and possibly a cassette swap, we can enjoy seamless indoor cycling experiences across varying terrains.
What Should I Consider for Noise Reduction During Indoor Training?
To reduce noise during indoor training, we should invest in soundproofing solutions like thick trainer mats. These mats absorb vibrations and protect our floors, creating a quieter and more enjoyable cycling experience.
How Often Should I Inspect My Indoor Trainer for Wear?
We can’t afford to neglect our trainer maintenance! We should inspect our indoor trainers every two weeks for wear indicators and monthly if used occasionally. This guarantees a safe, efficient ride while extending our trainer’s lifespan!
What Are the Best Practices for Cooling During Intense Indoor Sessions?
To cool effectively during intense sessions, we should focus on proper fan placement and a solid hydration strategy. Using multiple fans enhances airflow, while staying hydrated keeps our core temperature regulated and performance ideal.