As an Amazon Associate, we earn from qualifying purchases. Some links on this site are affiliate links at no extra cost to you. Our recommendations are based on thorough research and editorial judgment.

How Do I Know if My Chain Needs Replacing or Just Cleaning?
To determine if our chain needs replacing or just cleaning, we should look for specific signs of wear. Visual indicators like rust, binding links, or hooked sprocket teeth signal that a replacement may be necessary. We can also measure chain elongation; if it exceeds 0.5%, replacement is critical. Regular maintenance, including cleaning every 160 to 320 kilometers, can prolong life. Let’s explore how to measure elongation effectively and recognize more detailed signs of wear.
Key Takeaways
- Inspect for visual signs of deterioration like rust, binding links, or uneven tension, which indicate potential replacement needs.
- Check sprocket teeth for hooks, chips, or excessive wear; these typically signal that the chain should be replaced.
- Measure chain elongation with a gauge; if it exceeds recommended limits, replacement is necessary despite cleaning.
- Regular cleaning improves performance but won’t repair elongation; replacement is needed if wear indicators are significant.
- If experiencing jerky acceleration or frequent tension adjustments, these could be signs of chain wear requiring replacement, not just cleaning.
Understanding Chain Wear
You may be interested


When we look at chain wear, it’s vital to understand its implications on overall performance. Chain materials, such as solid steel, play an essential role in durability and measurement accuracy. Specialized tools, like roller diameter wear gauges, help assess wear that visual inspections might miss. Regular maintenance schedules, including elongation checks, help us monitor wear and prevent unexpected failures. By measuring wear in percentage increments, we guarantee that chains remain within acceptable limits defined by ANSI standards. This proactive approach reduces mechanical losses and enhances drivetrain efficiency, as regular cleaning improves chain longevity and performance.
Signs Your Chain Needs Replacement

Recognizing the signs that your motorcycle chain needs replacement is crucial for maintaining ideal performance and safety. Here are the main indicators:
Visual Signs
- Look for rust accumulation or binding links causing uneven chain tension.
- Examine sprocket teeth; if they’re hooked, chipped, or excessively worn, it’s time for replacement.
- Any significant pulling away from sprocket teeth signals chain elongation.
Performance Symptoms
- Jerky or uneven acceleration can point to chain wear.
- Listen for unusual metallic noises; they often indicate drivetrain balance issues.
Maintenance Indications
- Frequent chain tension adjustments suggest wear progression.
- Using swingarm measurement stickers helps track wear.
- Regular checks with a chain wear indicator gauge can help determine when it’s time for a replacement.
Addressing these signs promptly can enhance both your safety and riding experience.
Recommended Products


Measures static timing on Cummins J K N NH V-12 N-14 and L-10 series diesel engines

Street American V-Twin > ENGINE > Engine Other > Camshafts
Measuring Chain Elongation

Measuring chain elongation is an essential process that allows us to assess the wear and efficiency of our motorcycle chains. To achieve measurement accuracy, we should select a chain section under load, ideally where it passes over a sprocket. Using calibrated rulers or measuring pins, we can determine the chain length over a fixed number of links. The elongation percentage is calculated using the formula: ( frac{text{measured length} – text{original length}}{text{original length}} times 100% ). By measuring a longer section, such as 40 or 80 links, we improve the accuracy of our wear assessment. Regular monitoring of elongation helps us identify the need for maintenance, ensuring the best chain performance and longevity. Additionally, maintaining the right tire pressure can enhance overall bike performance, making it crucial for efficient riding.
Using a Chain Wear Gauge Tool

Using a chain wear gauge tool is vital for maintaining ideal performance and longevity of motorcycle chains. To guarantee chain gauge accuracy, we must first verify that the gauge’s jaws are undamaged and that it slides freely. Proper calibration is essential; avoid leaving plastic gauges in direct heat.
When measuring, align the gauge precisely with the chain pins or rollers. Apply light pressure until the gauge stops. To interpret wear readings, we observe percentage markings. For instance, a 0.5% wear indicates a need for immediate replacement in 11 or 12-speed systems, as high-quality tools can help ensure consistent maintenance and performance.
Recommended Products

X-PRO 125cc Gokart brought by XPROUSA. Please Noted this bike cannot be sold to California.
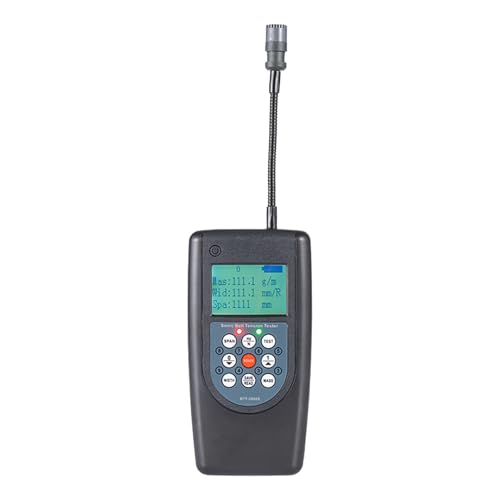
Adjustable probe.
Built from heavy-gauge steel to withstand wear and tear
Recognizing Visual Indicators of Wear

Visual indicators play an essential role in evaluating chain wear and determining maintenance needs. During a visual inspection, we should examine the chain for signs such as gaps between the chain and front chainring, indicating elongation. A worn chain may not fit tightly on the gearing, leading to poor engagement.
We should also inspect chain links and rollers for wear, such as rounding or unusual surfaces. Look for excessive play in the links and rust spots that signal degradation.
Lastly, noticing wear patterns on chainring and cassette teeth can help us assess overall chain condition. Shiny or irregularly shaped teeth often indicate a worn chain. Regular maintenance checks can guarantee we replace chains before they cause drivetrain damage. Additionally, impact resistance is crucial for ensuring that your bike’s drivetrain remains in optimal condition during rides.
Cleaning vs. Replacing: Key Differences
When we discuss chain maintenance, it’s essential to understand the key differences between cleaning and replacing a worn chain.
Chain Cleaning
Chain cleaning removes dirt and contaminants, enhancing performance and extending chain life. Regular cleaning can reduce wear caused by surface grime, improving efficiency. However, it does not repair or halt mechanical elongation. Additionally, just like with spoke tension meters, regular checks of chain condition are crucial for optimal performance.
Replacing
Replacing a chain is necessary when elongation exceeds recommended limits, typically every 1,500 miles under average maintenance conditions. A worn chain damages gears, resulting in costly repairs.
Recommended Products

Kit contains: 1 Liter LoamFoam, 500ml Foaming Degreaser, 60ml LinkLube All Weather, Bog Brush, Drivetrain Brush, cleaning cloth, toolbox with removable tray

Detox : Brake and drivetrain cleaner. The highest quality surfactants and degreasing agents, Spray on clear and watch the chemical reaction turn deep red as the cleaner encapsulates and removes muck, grease, and grime from your drivetrain, chain and disc brake rotors.

THE ULTIMATE GIFT: The Muc-Off Ultimate Bicycle Cleaning Kit is the perfect gift for any bike fanatic. We’ve bundled together a selection of our best products to cover all bases when cleaning your bike – including the tools you need to get the job done.
When to Clean Your Chain
Understanding the ideal times for cleaning our chain is crucial to maintaining its performance and longevity. Generally, chains need cleaning every 100-200 miles, depending on riding conditions. Environments that are wet, muddy, or dusty necessitate increased cleaning frequency to prevent wear.
We should look for signs of dirt accumulation. If we notice visible grime, grease, or noise during pedaling, it’s time for a clean. Stiff links or difficulty shifting gears often indicate buildup impairing performance.
After rides in particularly dirty conditions, it is important to clean and inspect the chain. Additionally, if we see dark residue in the gaps between links, that’s a clear signal for immediate cleaning to guarantee smooth operation and extend chain life. A specialized brush set can help effectively remove dirt and grime from hard-to-reach areas of the chain.
Proper Cleaning Techniques for Chains
Proper cleaning techniques are integral to maintaining a bike chain’s functionality and lifespan. We should establish a regular maintenance schedule that includes frequent cleaning based on riding conditions.
Ultrasonic Cleaning Method
We can use degreaser and an ultrasonic tank, which cleans effectively without harsh scrubbing. Pre-wipe the chain, then soak it in heated degreaser for 15-30 minutes.
Traditional Soaking Method
Removing the chain allows for a thorough soak in degreasing solvent. A boiling water bath with dish soap removes congealed lubricants.
Clip-on Chain Cleaners
For on-bike maintenance, these devices clean the chain without too much mess.
Manual Brushing
Using stiff brushes guarantees we scrub every link. Always dry the chain thoroughly after cleaning to prevent rust and inspect it for any residue. Additionally, using a powerful foaming action degreaser can enhance the cleaning process, ensuring that stubborn grime is effectively removed.
Chain Lubrication Best Practices
To guarantee peak performance and longevity of chains, we must pay close attention to lubrication practices. Proper lubrication is essential for reducing friction between chain components, which minimizes wear on pins and bushings. It can even extend chain lifespan by 2 to 4 times.
We should choose the right lubricant types, focusing on those with deep penetration and high-film strength to protect against metal-to-metal contact. Automated lubrication systems offer consistent oil delivery, enhancing reliability. Additionally, selecting a biodegradable lube can promote sustainability while ensuring optimal performance.
Common methods include:
- Aerosol/Spray Lubrication: Quick but may be uneven.
- Brush Lubrication: Precise but labor-intensive.
- Drip Lubrication: Effective for uniform coverage.
Installation and Repair Considerations
Chain Length Adjustment
First, determine the proper chain length by placing it around the largest chainring and sprocket. Add two or three links for adequate tension. Verify the chain is not too tight or too loose, as both can affect shifting quality. Compact designs enhance ease of storage, making it simpler to keep your tools organized for regular maintenance.
Routing and Connection
Route the chain correctly through the derailleur according to manufacturer guidelines. When connecting ends, use a chain breaker tool or appropriate quick link, confirming secure engagement with an audible click.
Post-Installation Checks
After installation, check for smooth gear shifts. Inspect engagement points visually while pedaling to confirm proper installation. Regular checks will prevent issues and enhance your riding experience.
Using a Chain Breaker Tool
Using a chain breaker tool is crucial for maintaining bicycle chains and ensuring smooth operation. This tool consists of a handle, a screw-driven punch, and slots that hold the chain securely. Proper tool alignment is critical; the punch must be centered on the rivet pin to avoid damaging the chain.
To break a chain, we first place the link in the appropriate slot and carefully screw in the punch until it contacts the rivet pin. As we apply steady pressure, we push the pin partially out to allow for reconnection. If we experience resistance, it’s imperative to stop and adjust.
Regular use can help us diagnose chain condition and identify any need for cleaning or replacement.
Recommended Products

Compact pro-level tool case complete with 18 essential maintenance tools. Perfect for workshops, races, events or just at home in the garage.

Industrial/shop quality tool

A professional-grade tool designed to drive rivets in and out of any bicycle chain
Consequences of Ignoring Chain Maintenance
Ignoring chain maintenance can have significant repercussions that affect both the performance of our bicycle and our overall riding experience.
Increased Wear
Common mistakes, like neglecting to clean and lubricate the chain, lead to excessive abrasion and damage to drivetrain components. This can result in costly replacements, as a worn chain degrades chainrings and cassettes, increasing repair complexity.
Loss of Efficiency
Dirty chains reduce riding efficiency, causing a speed decrease of 1.6% to 3.5%. This extra friction demands more power to maintain speed, leading to rider fatigue.
Safety Risks
Corrosion and chain failures can occur from rust, posing safety hazards during rides. Maintaining the chain properly is essential to avoid these complications, emphasizing the importance of maintenance for a smoother, safer ride.
Best Practices for Extending Chain Life
To extend the life of our bicycle chain effectively, we should establish a consistent maintenance routine tailored to our riding conditions.
Cleaning Schedule
Let’s clean our chain every 160 to 320 kilometers, adjusting for conditions like wet or dusty environments. It’s vital to use proper maintenance tools, like a dedicated chain cleaner or biodegradable degreaser, for effective cleaning.
Lubrication Practices
We need to lubricate our chain every 150 to 300 kilometers. Using the correct lubricant based on our environment—wet or dry—will also help.
Avoiding Common Mistakes
Remember not to over-lubricate, as excess lubricant attracts grime. Finally, we should monitor chain materials and proactively replace the chain based on wear indicators to prevent additional drivetrain damage.
Storage Tips to Prevent Chain Damage
When we consider how to effectively store our bicycle chains, it is essential to prioritize conditions that prevent corrosion and damage. We should choose storage solutions that maintain a dry, cool, and well-ventilated environment. This minimizes the impact of environmental factors like moisture, which can accelerate rust.
To enhance chain longevity, we recommend these practices:
- Hang chains on hooks or use racks for air circulation.
- Store chains off the ground to avoid moisture contact.
- Place chains in protective containers to reduce contamination risks.
Additionally, we must make sure chains are clean and dry before storage. By adhering to these guidelines, we can safeguard our chains, prolonging their performance and lifespan.
Frequently Asked Questions
How Often Should I Check My Chain for Wear?
We’re committed to regular chain maintenance, inspecting at least annually or more frequently for severe conditions. By checking for clear wear indicators, like elongation, we guarantee safety and reliability, preventing costly breakdowns and accidents.
Can a Rusty Chain Be Cleaned and Reused?
Absolutely, a rusty chain can be cleaned and reused with effective rust removal techniques! By following proper chain maintenance tips, like using baking soda or chemical removers, we can restore functionality and prolong its life.
What’s the Best Lubricant for Bike Chains?
For bike chains, we’d recommend oil types like wet for muddy rides and dry for dusty conditions. Utilizing proper lubrication techniques guarantees peak performance while keeping our chains clean and efficient.
How Long Do Bike Chains Typically Last?
Curious about chain lifespan? Typically, bike chains last around 3,000 kilometers, but various longevity factors, like riding conditions and maintenance, can drastically alter that. Let’s explore how we can keep our chains in top shape!
Is It Safe to Ride With a Worn Chain?
It’s not safe to ride with a worn chain. Prioritizing chain maintenance helps guarantee good chain performance, preventing costly mechanical failures and enhancing our overall safety on the road. Regular checks are essential!